Calvin


Calvin
Published 2017-05-11T08:59:45+00:00
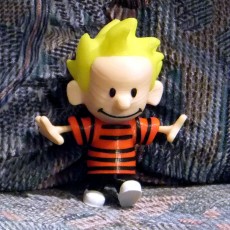
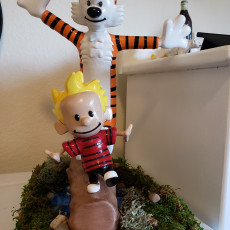
Calvin, from the comic strip by Bill Watterson.
The comic strip Calvin and Hobbes follows the humorous antics of Calvin, a precocious, mischievous and adventurous six-year-old boy, and Hobbes, his sardonic stuffed tiger.
The full model is built using individual models of Calvin and Hobbes, therefore I created three separate Thingiverse uploads:
https://www.myminifactory.com/object/calvin-and-hobbes-35230
For the Calvin model see:
https://www.myminifactory.com/object/calvin-35231 (this upload)
For the Hobbes model see:
https://www.myminifactory.com/object/hobbes-35232
No supports are required. If you have the right filament colors, no painting is needed.
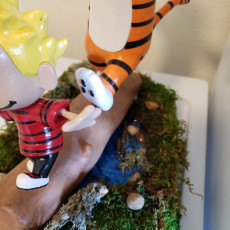
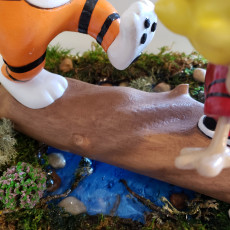
The fully completed model is 250mm tall after assembly.
Note: Calvin is 120mm tall and is designed to fit into the log from the final build. His foot is flat on the bottom and he can stand by himself but is not very stable without the log.
Enjoy!


Colors (there are no multiple printed pieces)
Yellow:
c_hair
..
Flesh (I use beige):
c_face
c_face_bottom
c_arm_left
c_arm_right
..
White:
c_shoe_left
c_shoe_right
..
Orange:
c_shirt_left
c_shirt_middle
c_shirt_right
..
Black:
c_pants
c_eye_left
c_eye_right
c_mouth
c_stripe_1 though c_stripe_9
..
Any color (hidden connectors)
c_face_bump
c_body_bump
Printing and assembly tips
1-No supports are required.
..
2-The stripes are designed to be a single layer thickness of .2mm, or less as long as they print solid on your machine.
..
3-Be sure to clean any first layer squish if you have any problem joining parts. The parts should fit nicely when printed cleanly.
..
Assembly tips:
-'Stripes! There had to be stripes!' I avoided creating this model for quite some time due to the stripes. I finally settled on a design:
. The stripes are printed flat, one layer high
. The parts that the stripes are glued to contain indents for stripe placement.
. Most of the stripes are slightly curved to help wrap around the surface.
-*Important: To make it simpler to glue flat stripes to a round surface, take a moment to curl the stripes like you would with a piece of ribbon. Using a flat edge, pull the stripe along the edge to make it curl. Pay special attention to the very ends and ensure the ends curl.
-Test the length of each stripe before gluing, due to printer differences, stripes may need to be trimmed a bit.
-Optionally, instead of using the 3D printed stripes, the stripes can be painted on using the indents as a guide.
-The diagram below will help in assembling the model and is quite straightforward.
-The model is meant to be glued together. I use E6000 glue. It is a nice clear tacky glue allowing for easy part positioning. The longer you let it sit before joining parts, especially for the stripes, the tackier it gets until it fully sets.
-The Calvin model fits the log using the Thingiverse links provided in the introduction.
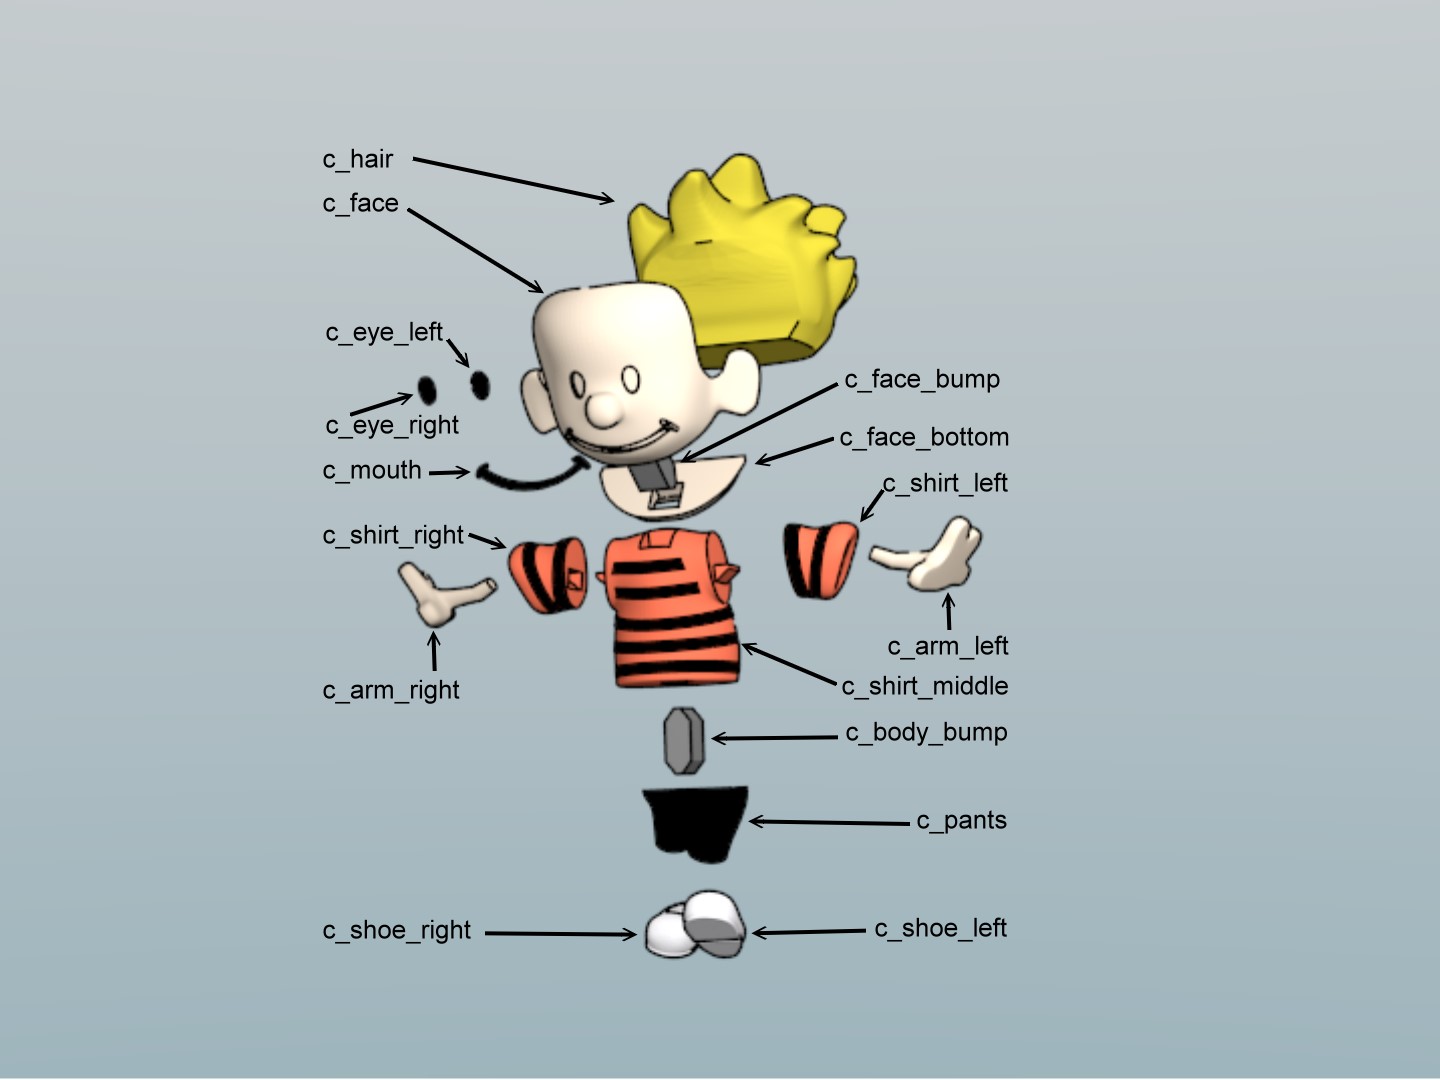
Calvin assembly
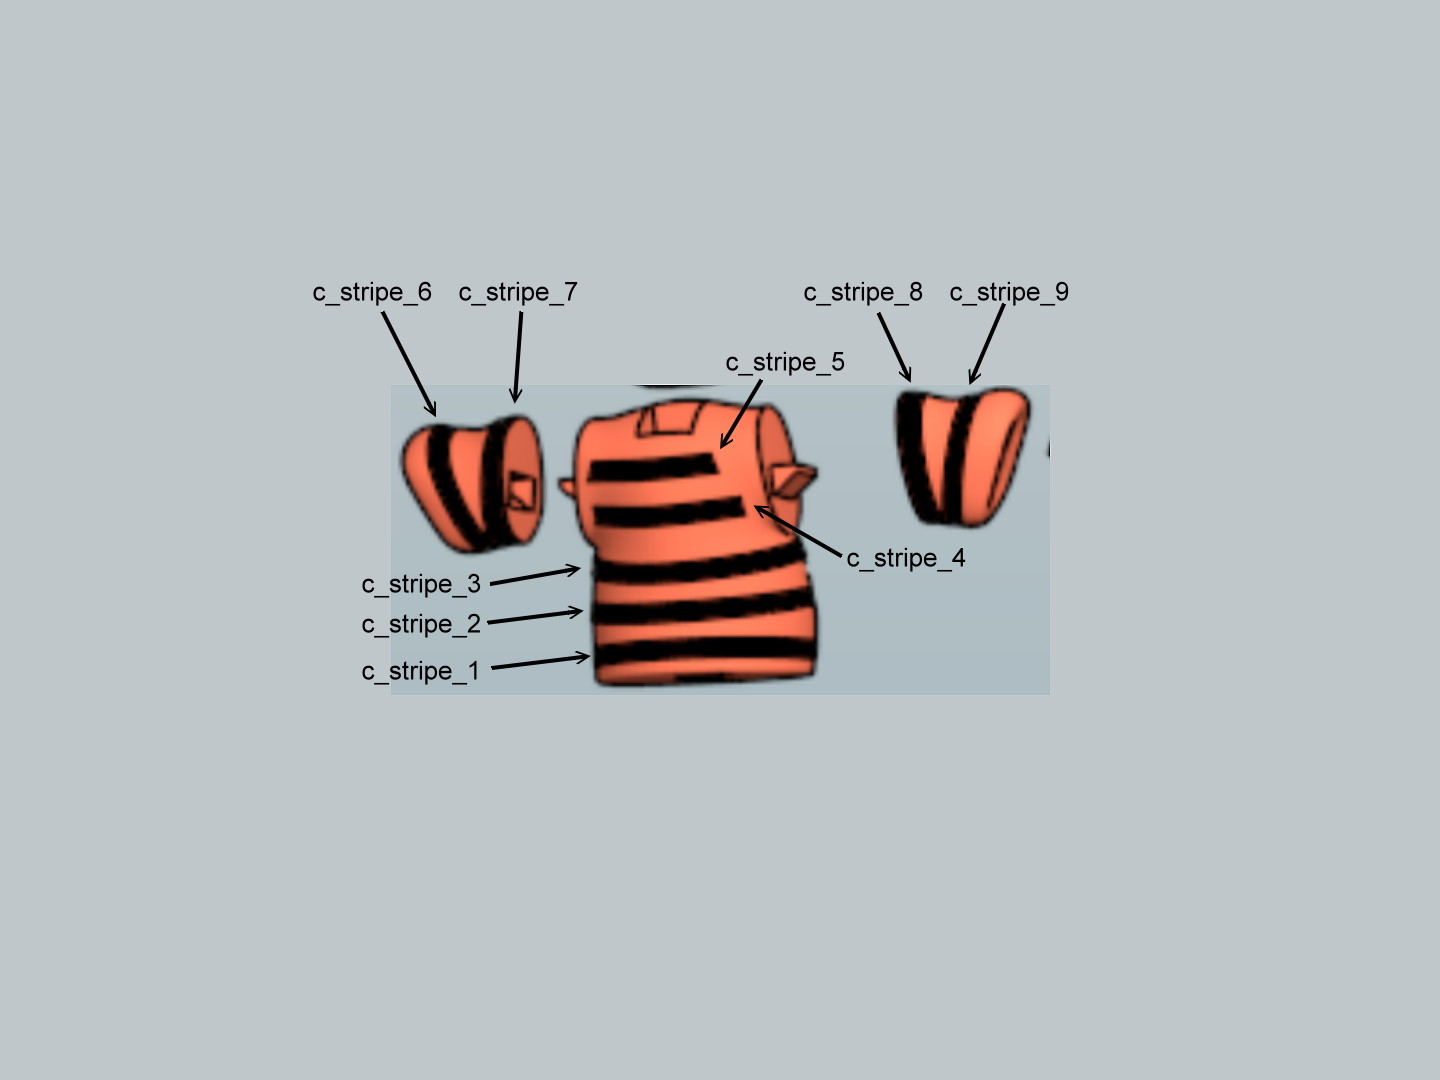
Calvin stripe assembly
| Date published | 11/05/2017 |
| Technologie | FDM |
| Schwierigkeitsgrad | Easy |


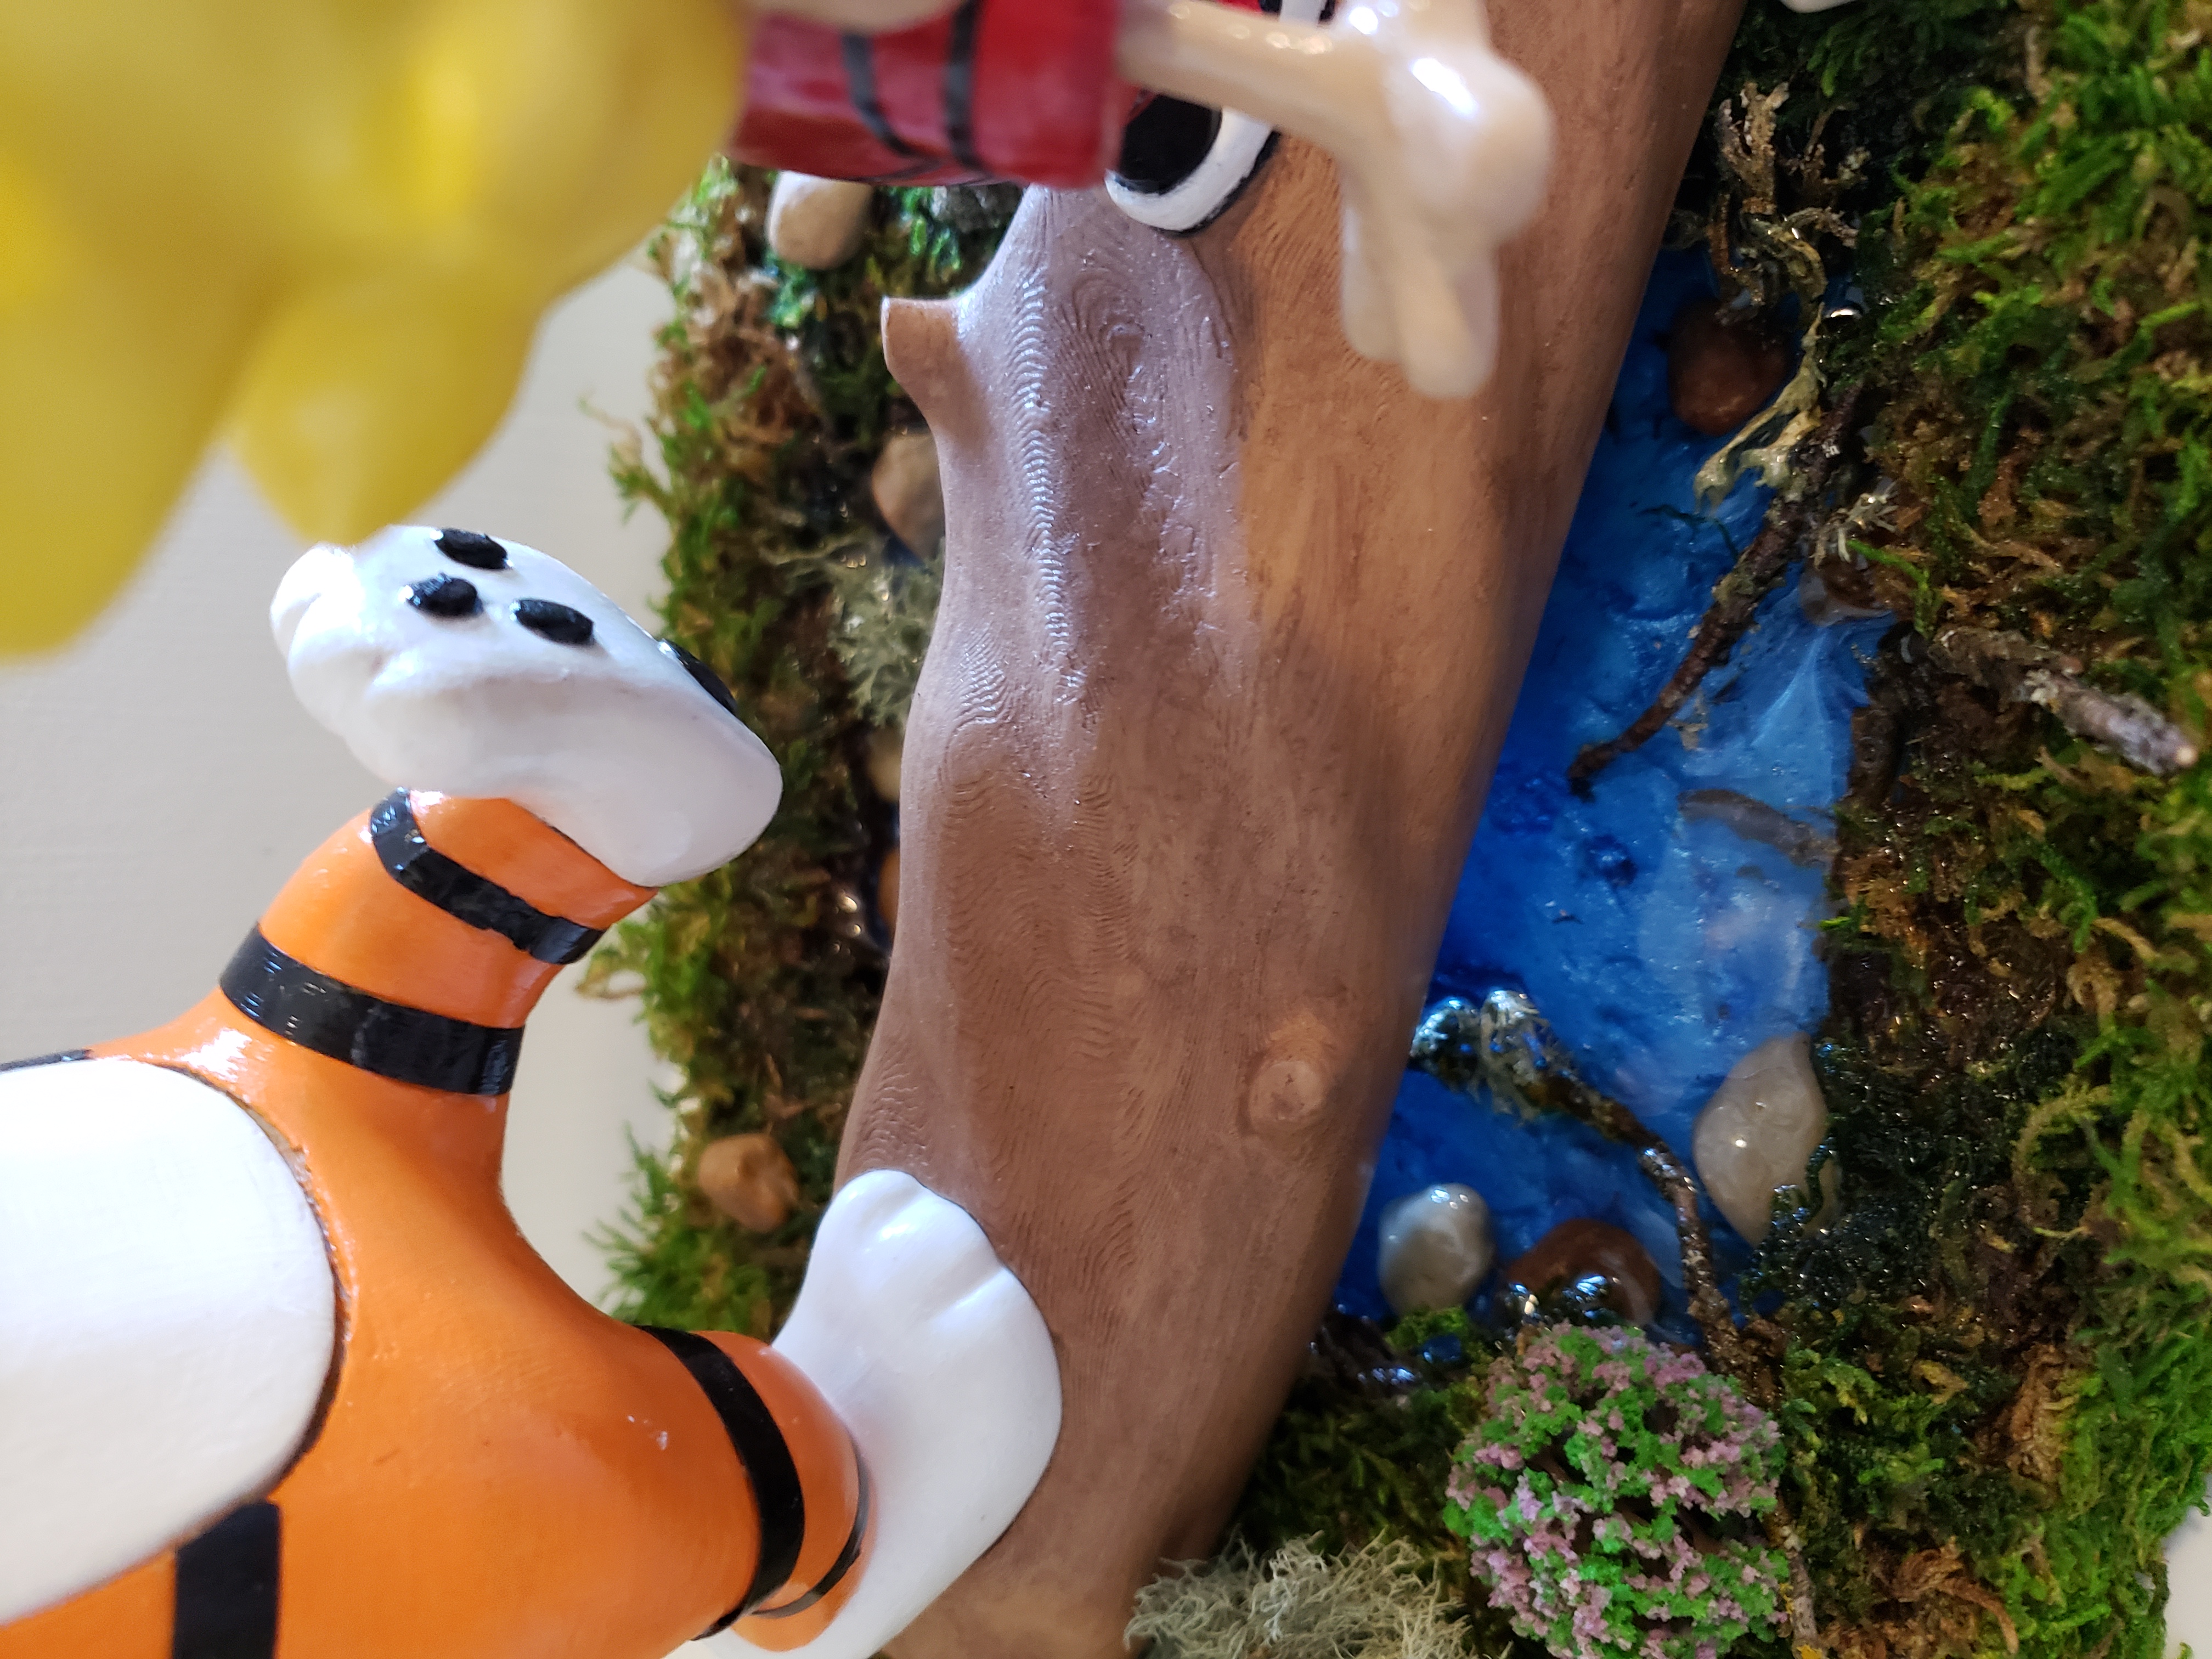

After my previous experience printing the associated Hobbes model, I went ahead and skipped printing the stripes and just painted them on instead. My little spider just is not capable of such fine detail. Either that or the user (me) is at fault, and I vote it's the Tarantula :) This went together easily and printed great with the recommended settings from the designer. Now to print the log and complete this wonderful model!