Lesson 6 Object 260


Lesson 6 Object 260
Published 2016-08-16T15:07:00+00:00
Printing Tutorial
Object 260
Part 6 of 8
Over the next 8 lessons I will be showing you how to reproduce the « Object 260 » tank on your home printer.
I will include detailed part lists and assembly instructions plus videos of different stages during the manufacturing, assembly and finishing of the tank.
The tutorial will cover :
Printing the individual parts
Post preparation of printed parts
Assembly
Painting and finishing
If you follow this tutorial you will end up with a scaled version of the Object 260 and probably a headache from the repeated « Casatchock » music in each video. If anybody has difficulties or needs advice please contact me through MMF studios, I will be more than happy to help.
Tank Tracks
Part name Description Qty
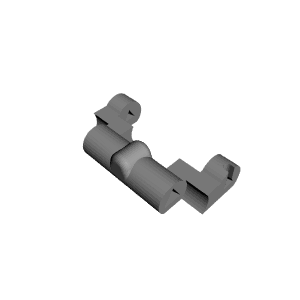
TR01 Track section 140
Printing the tracks
Start by printing 2 pieces. This will allow you to test fit them together before printing the 140 pieces needed, scale in the X,Y or Z axes if adjustment is needed and print new test pieces. You could mix and match 1 standard piece and 1 scaled piece if needed.
Once you are happy with the fit you can print all the pieces I could print half the required parts in one go. 70 pieces
Printer settings
Layer height 0,2mm
Top, bottom and side layers 3
Infill 25%
Support 0%
Download the PDF file for more details
Object 260 Lesson 6 from Reg Taylor on Vimeo.


Start by printing 2 pieces. This will allow you to test fit them together before printing the 140 pieces needed, scale in the X,Y or Z axes if adjustment is needed and print new test pieces. You could mix and match 1 standard piece and 1 scaled piece if needed. Layer height 0,2mm Top, bottom and side layers 3 infill 25% Support 0%
| Date published | 16/08/2016 |
| Tecnologia | FDM |
| Complessità | Easy |
| Supporto Gratuito | YES |